
If you've created a Shipment in Advanced Inventory Mgmt or MerchIQ, it needs to be processed for the quantities to move to in-transit. The process for working with pending Shipments is the same for Advanced Inventory and MerchIQ users.
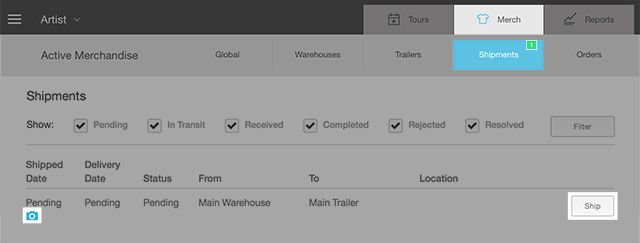
- Log in to atVenu.com
- Click on Merch
- You'll notice a green indicator showing a pending Shipment
- Click on Shipments
- On the Shipments list page, click on the Ship button for the Shipment you want to process
Tip: The Camera icon will give you a visual preview of the items in the Shipment
- Enter any pertinent Shipment information (Contact Names, Phone, Email, Shipper Account Number, Tracking Number, and Shipping Cost)
- The Ship To location can be added using the Upcoming Venues dropdown. Here, you can select from a list of Venues that have been added to your Routing
- Click on the Change Facilities button to change the source and destination facilities
- Export a PDF version of the Shipment using the PDF button at the top of the page
- Edit any of the quantities as needed or remove any item from a Shipment before processing it by clicking the X button below the item's image
- You can save the information you entered without processing the Shipment by clicking Save. You can return later to finish processing the Shipment
- Cancel the entire Shipment by clicking Cancel Shipment
- To process the Shipment, confirm the Shipment quantities are correct and then click Ship Now to process it
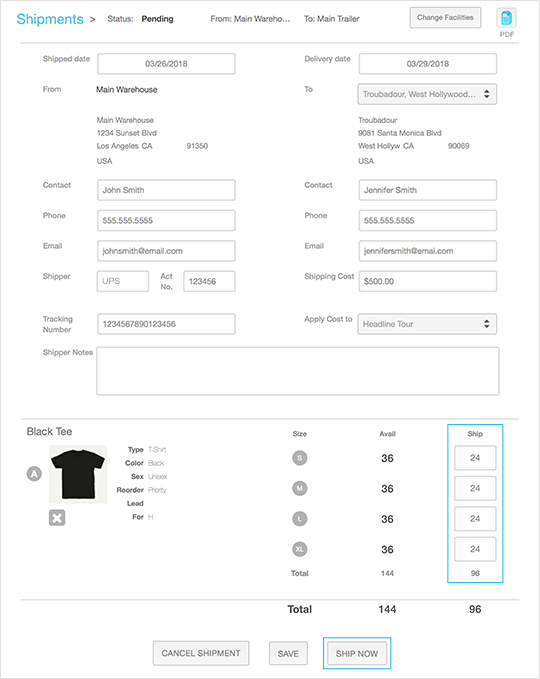
- Now that you've clicked Ship Now, the Shipment is in-transit and the quantities will be reflected as Inbound
Also see:
- How do I receive a Shipment? (Advanced Inventory)
- How do I create a new merch Order (Advanced Inventory)
Comments
0 comments
Article is closed for comments.